Integrate Your E-commerce with PostNord Send
New to Portal Business?
Read more about how to get Access to Portal Business - PostNord Portal
Find an integration that works for you
PostNord Send connects to your online store through partner-built integrations. Our partners support many of the most popular e-commerce platforms and can assist you with setup and configuration.
All integrations labeled “Portal Integration” connect directly to PostNord Send and follow the setup process outlined in this guide.
How the integration works:
Once set up, a Portal Integration will:
Enable configuration of checkout shipping options and pricing, or allow syncing of shipments for booking purposes only
Automatically reserve and book shipments when a customer completes a purchase in your online store
Allow you to print shipping labels either in the portal or through the connected tool
1 - Set up your store connection
Go to PostNord send in the Portal Business side bar menu. Click the E-commerce tab at the top of the page.
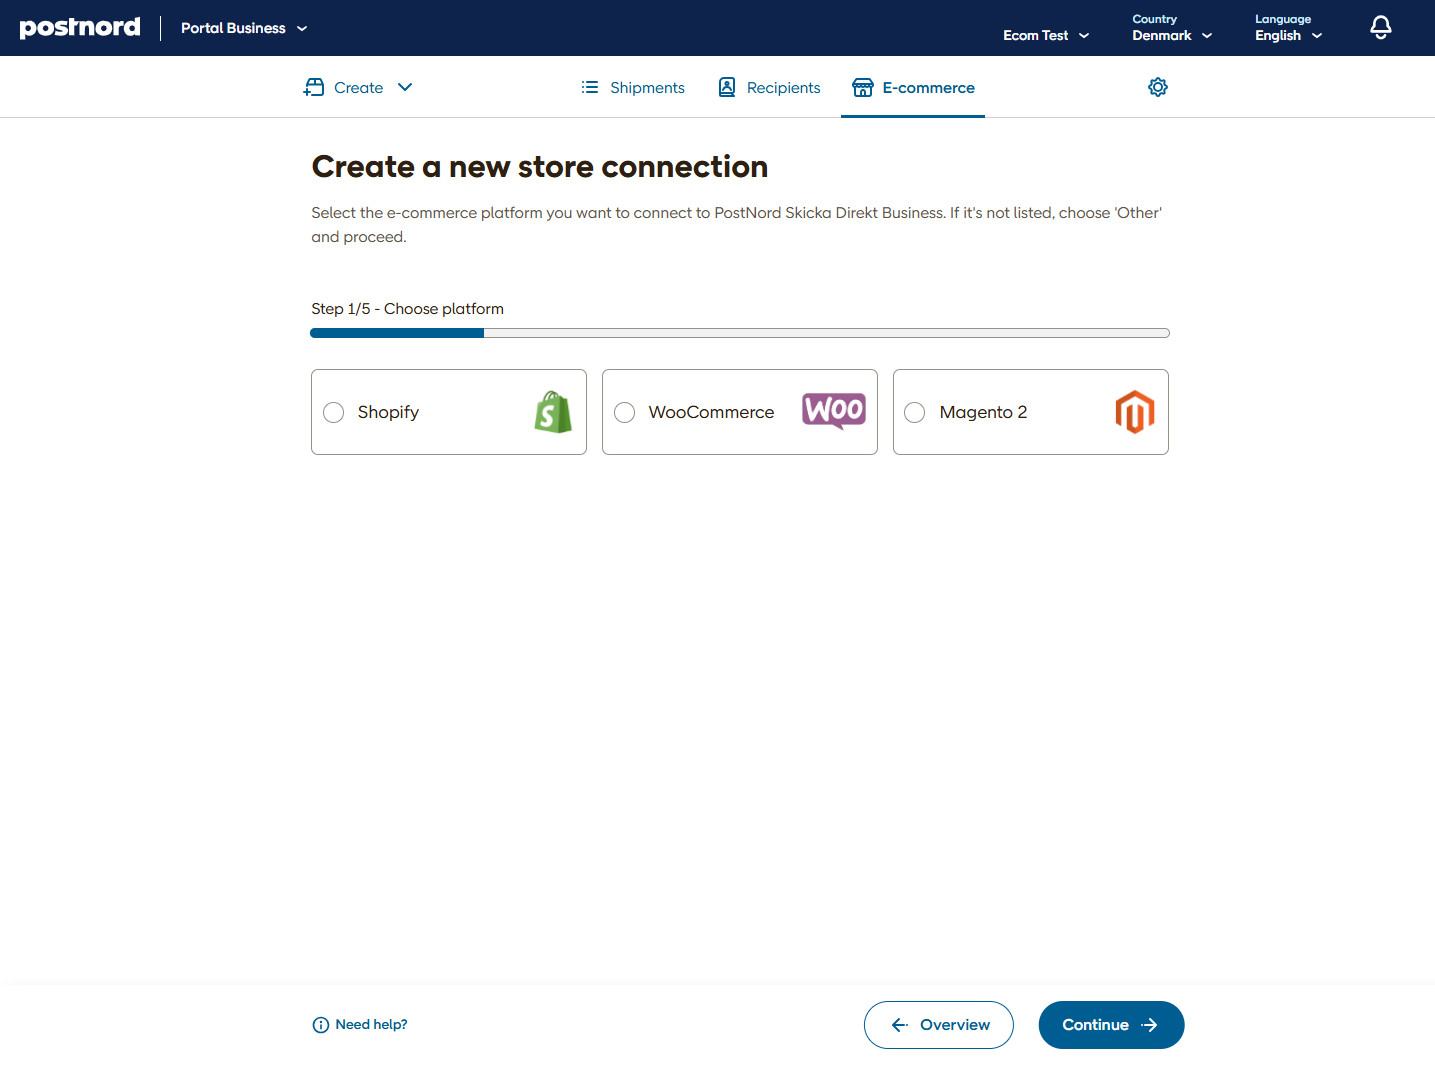
Click "Create new store connection" and select the platform you want to integrate with.
Select the e-commerce platform you want to connect to PostNord Send.
Select thePortal Integration offered by one of our partners that you plan to use.
Enter the details of your store.
Select the sender address that will appear on the created freight labels.
Create a new store connection or copy from an existing one to complete the connection.
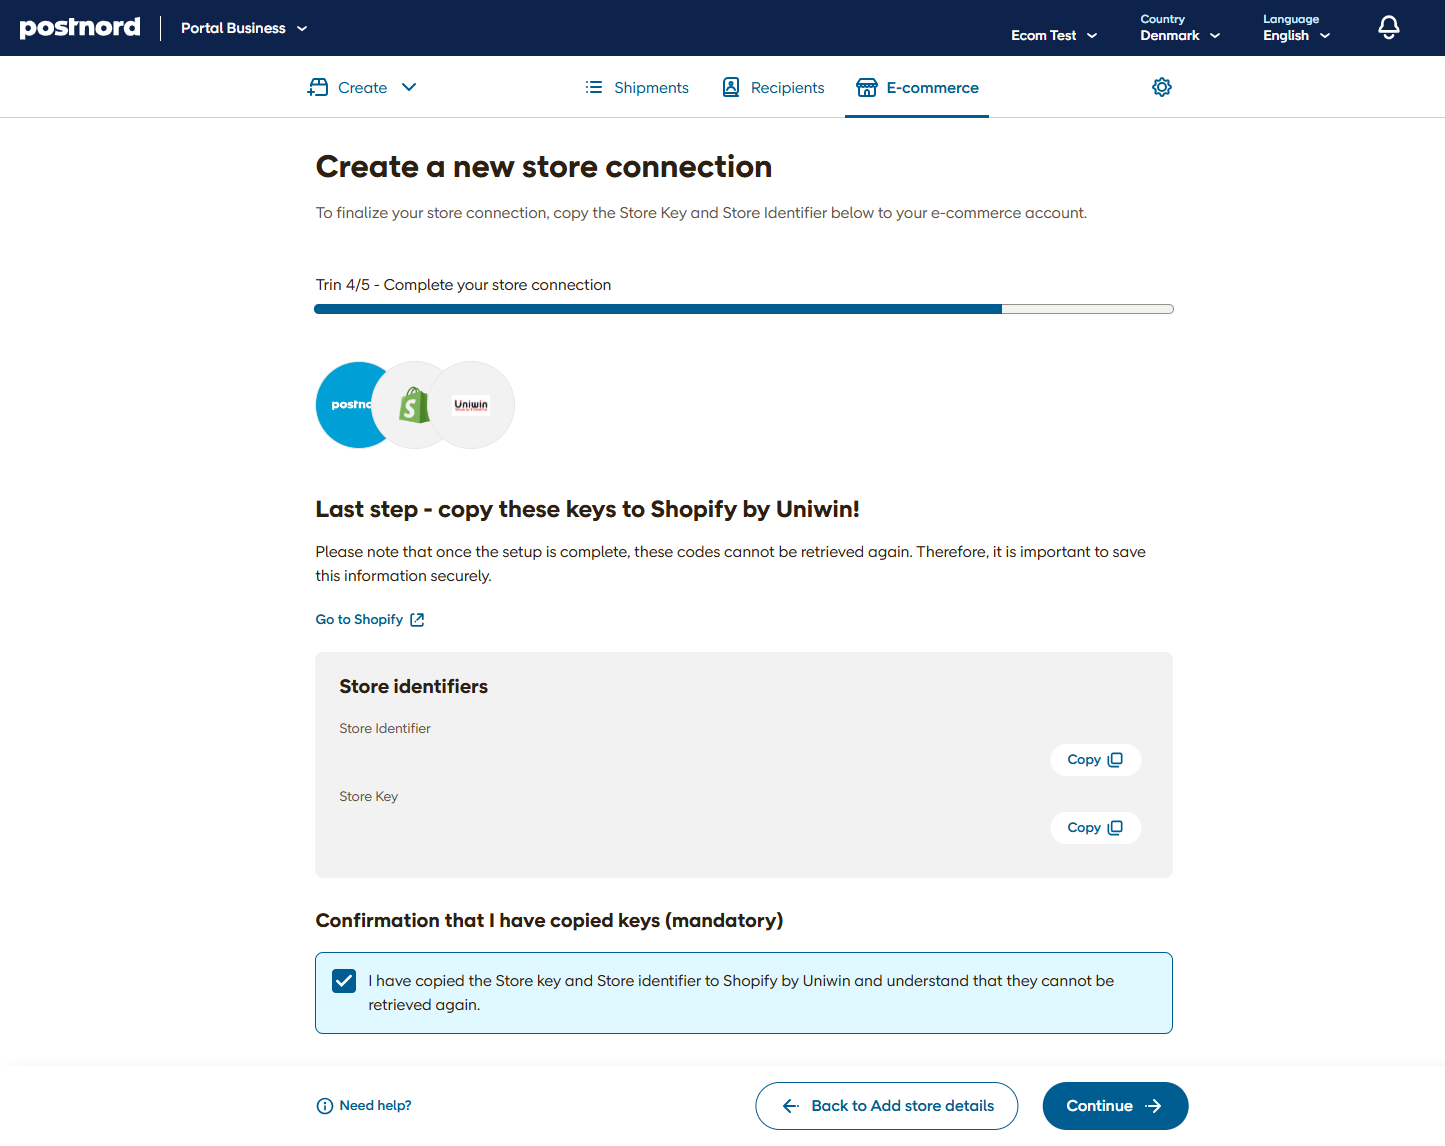
To complete your store connection:
Copy your unique Store Key and Store Identifier into the e-commerce interface provided by your integration partner.
Depending on the integration type, the configuration interface will either be located within your e-commerce platform or inside the plugin/app provided by the partner.
For detailed setup instructions, please contact your integration partner directly.
⚠️ Important: Be sure to save your Store Key and Store Identifier in a secure location. These credentials cannot be retrieved later from PostNord Send, so keeping a backup is essential.
2 - Configure Your Shipping Services
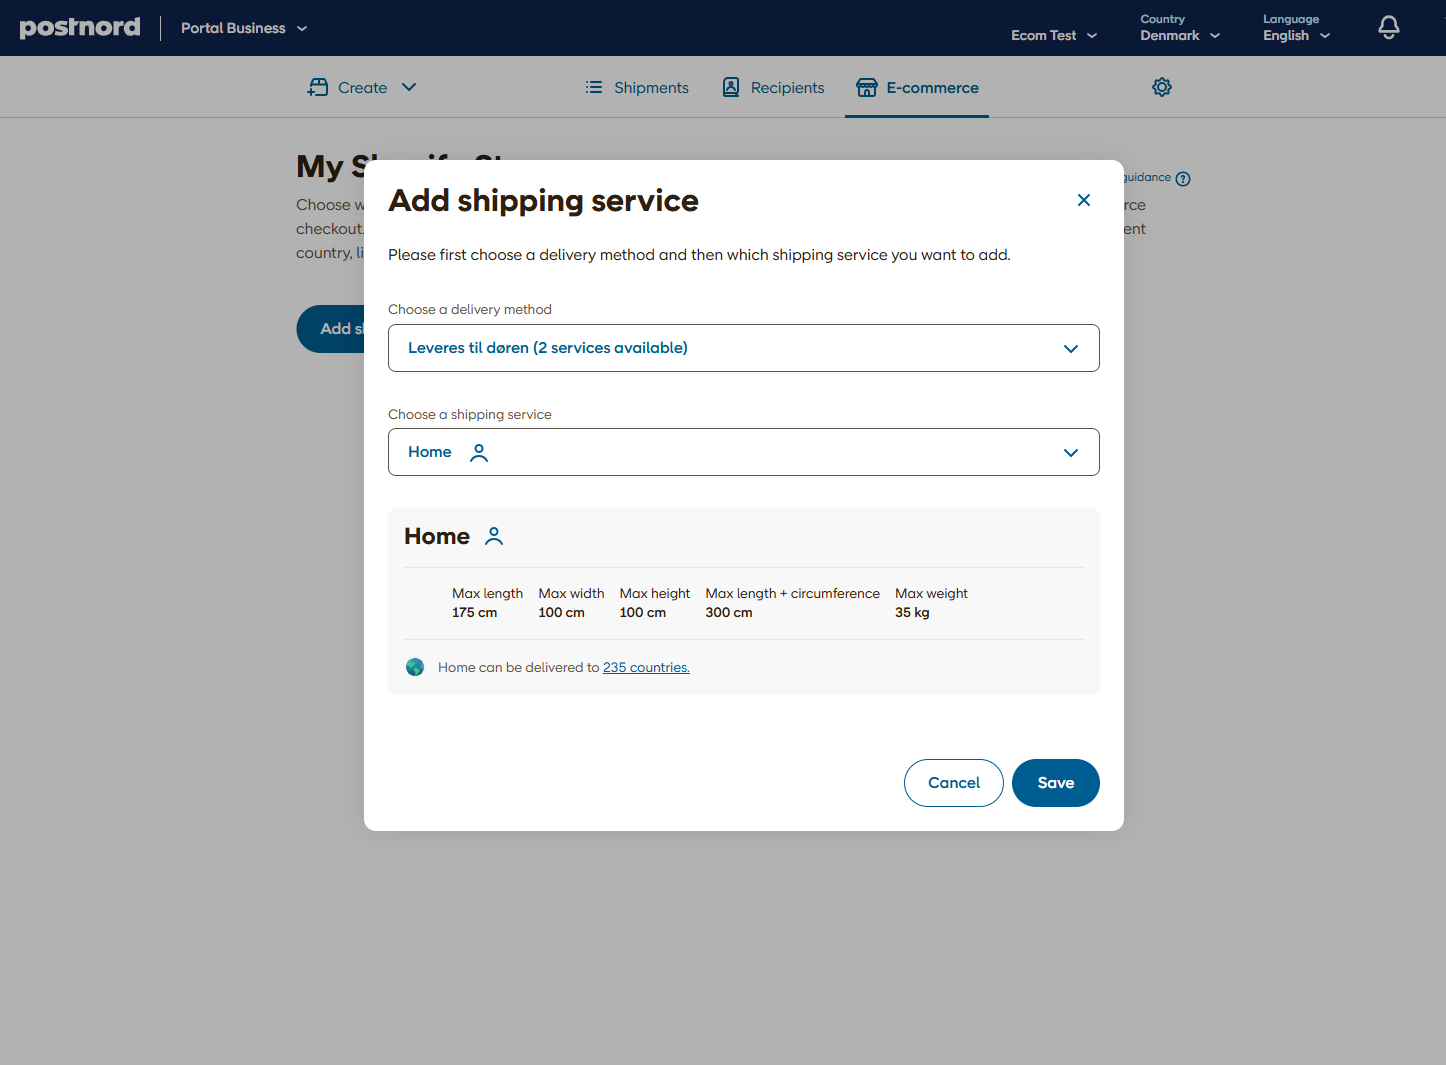
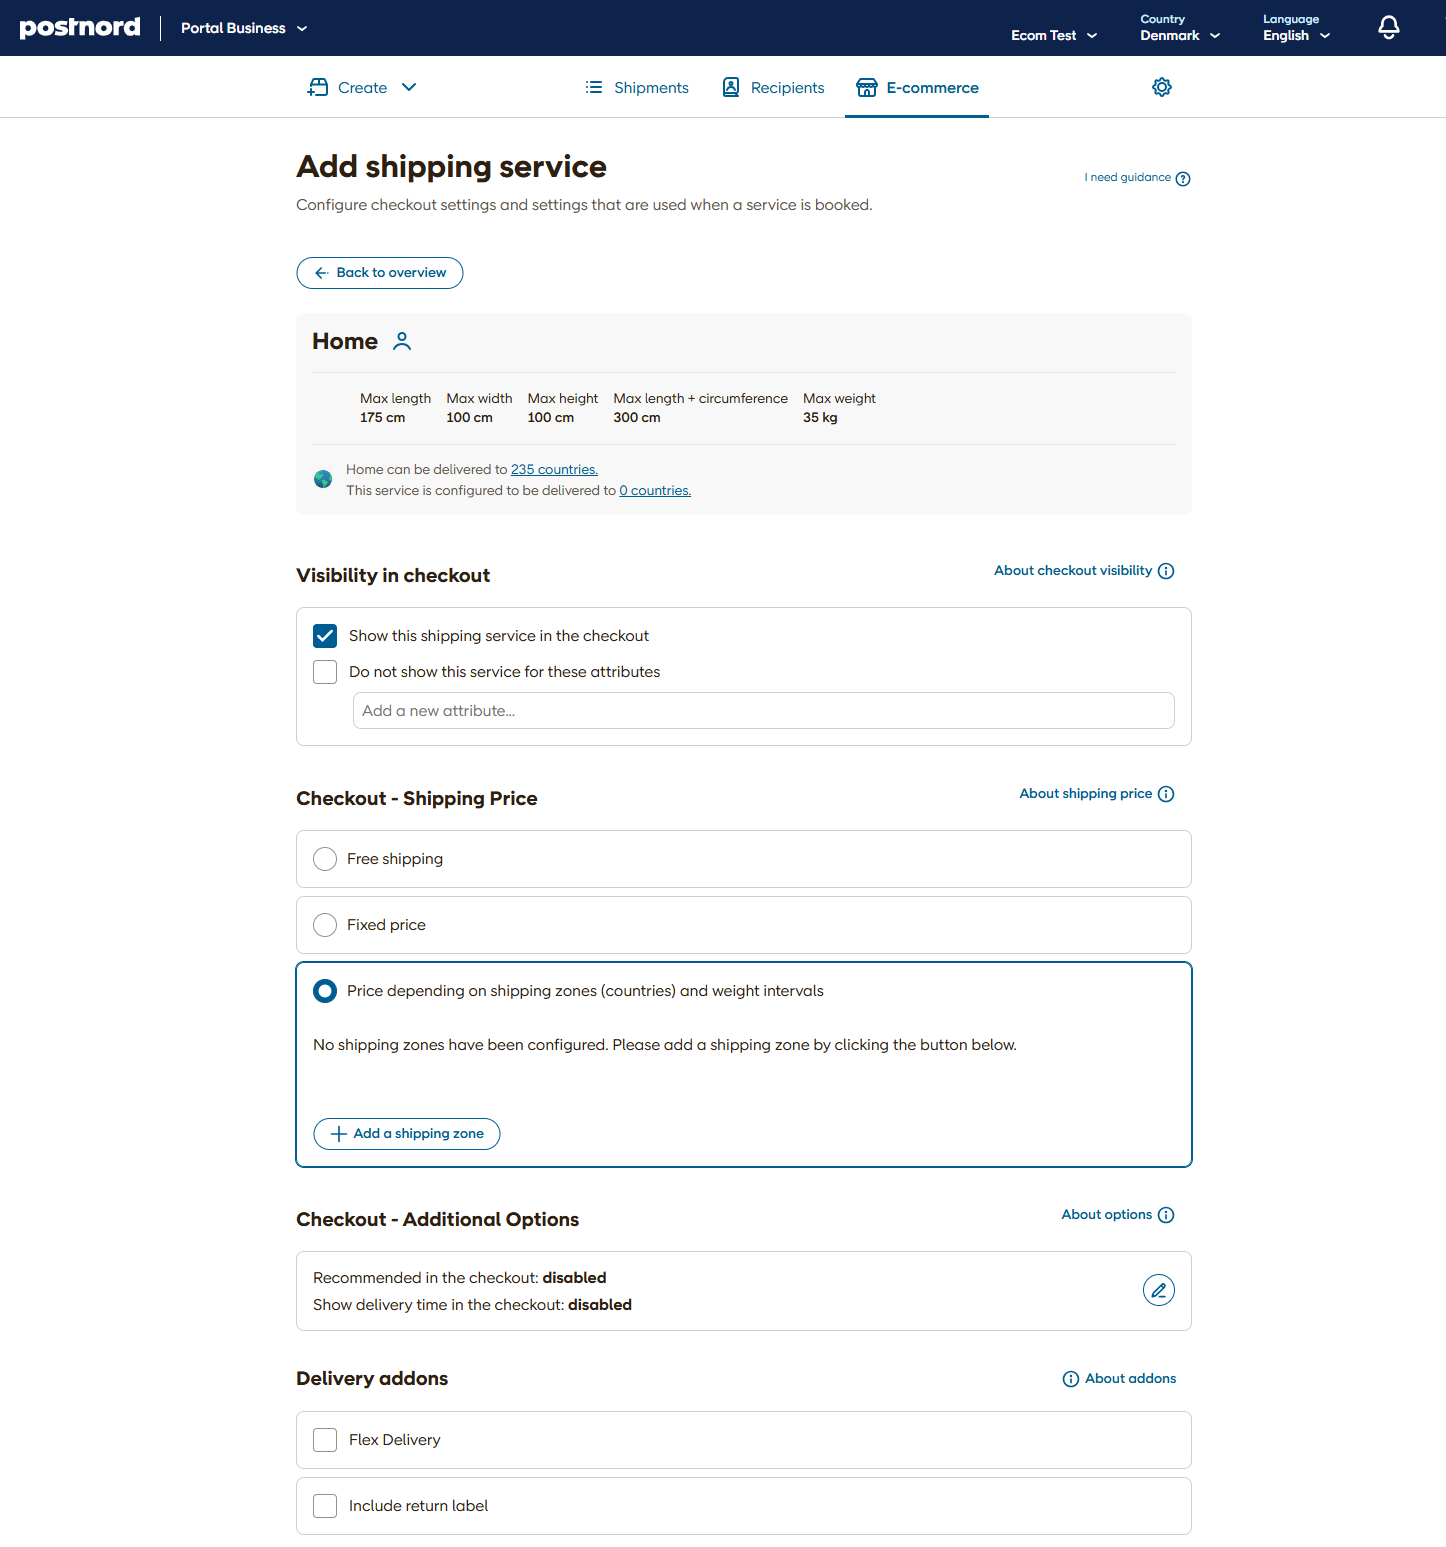
Once you've completed a new store connection, you’ll be automatically redirected to this configuration page. To access it later, go to the E-commerce tab in PostNord Send, open your store connection, and click “Add shipping service.”
Choose Delivery Methods and Services
Select from various delivery methods, each offering different PostNord shipping services. You can choose which services to book and optionally display to your customers at checkout.
Configure Checkout and Booking Settings
On the shipping service configuration page, you can:
Set checkout rules such as:
Free shipping thresholds
Fixed pricing
Pricing based on weight and destination country
Control visibility by hiding services based on cart value, weight or attributes
Enable estimated delivery time (ETA) in checkout, including your internal handling time
Add Optional Services
You can activate addons for each shipping service. These will be applied to all shipment reservations using that service. Addons can also be adjusted later for individual shipments in the Unconfirmed list under the Shipments tab in PostNord Send.
Test your connection
If possible, set up a test environment for your online store to ensure the integration functions as expected.
Once the connection is correctly configured, you’ll be able to reserve and book shipments when a customer completes a purchase—either manually or through automation features provided by some of our integration partners.
If you’ve configured shipping options for checkout, your store’s checkout should now display the services you selected.
3 - Manage Incoming Shipments and Print Shipping Labels
You can now print shipping labels either directly in the portal or via your connected tool.
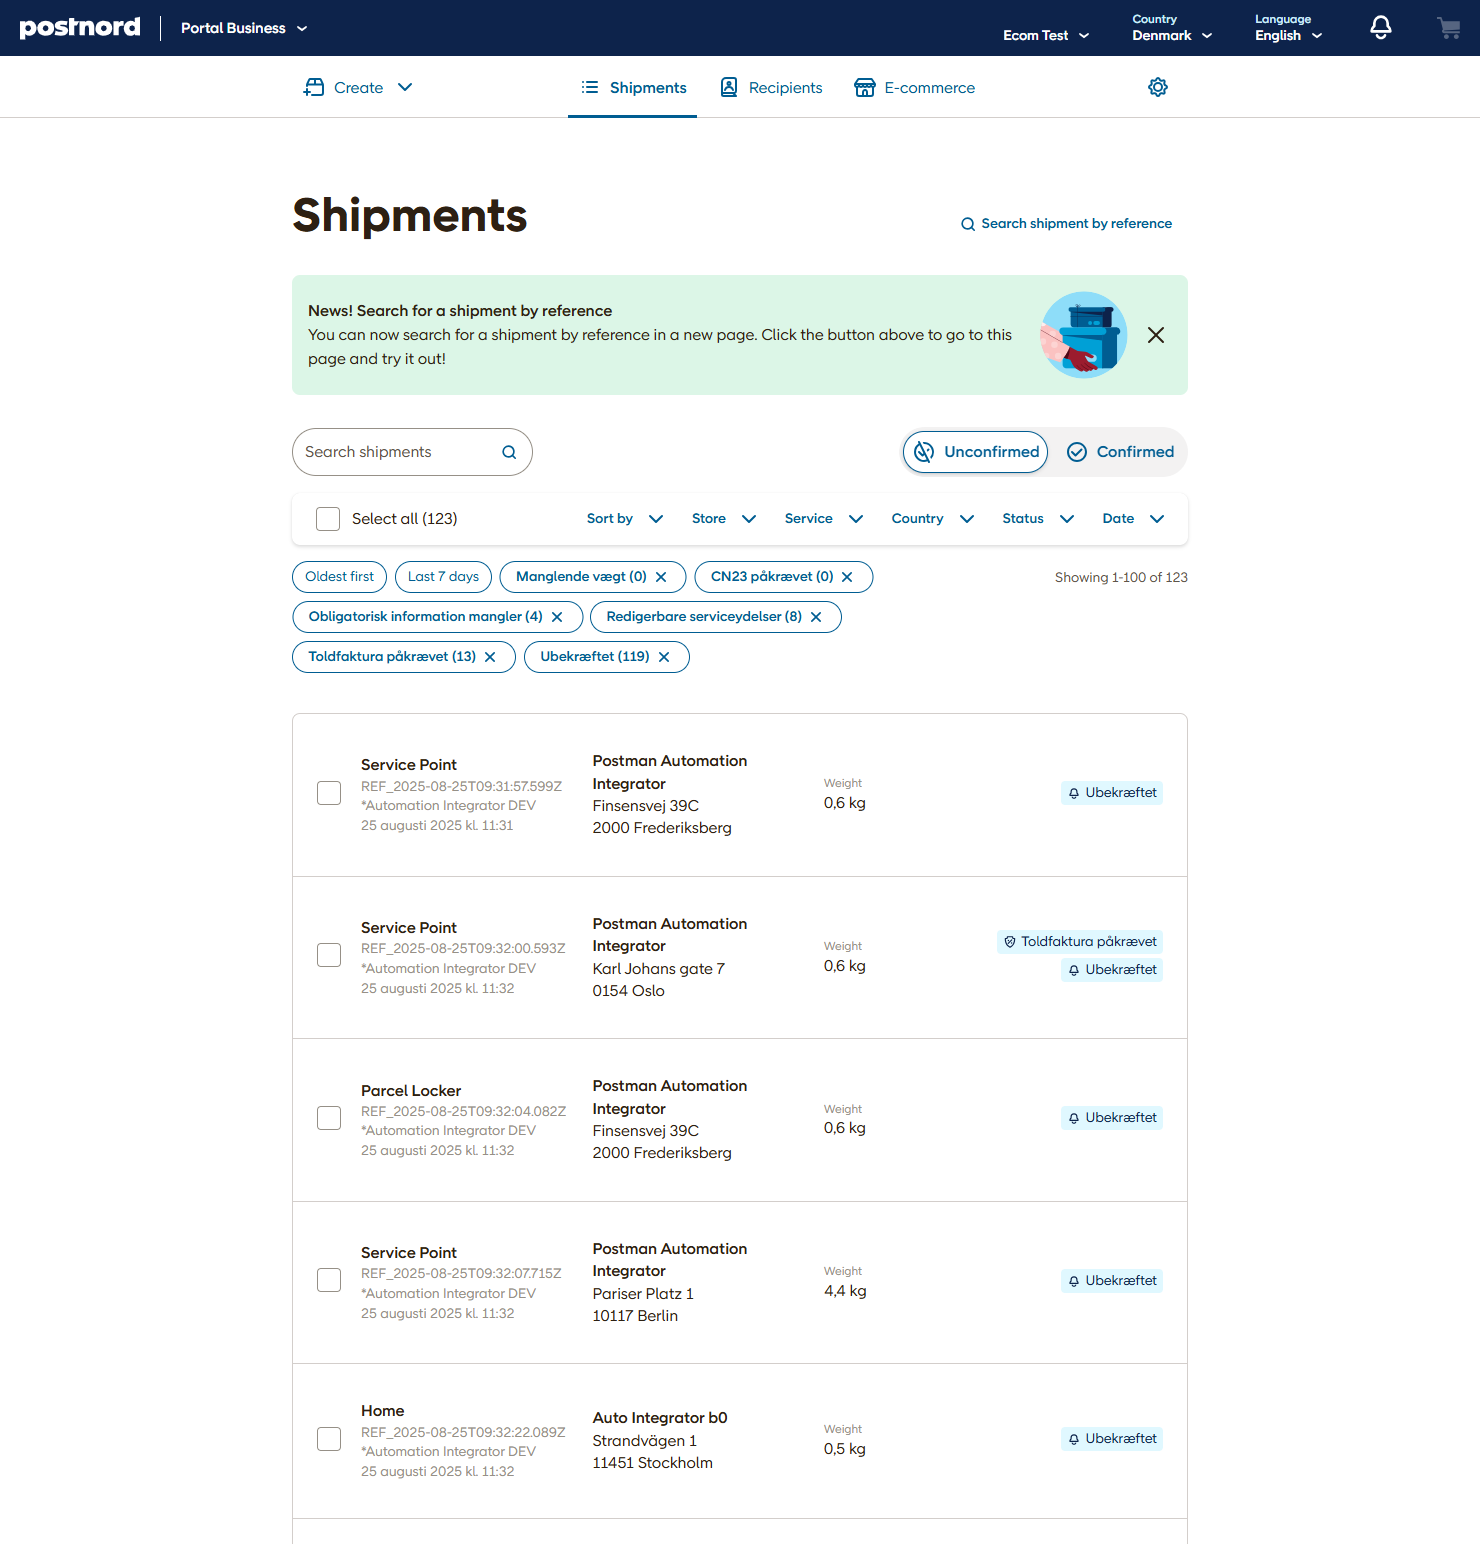
Incoming shipment reservations can be found under “Shipments” > “Unconfirmed” in PostNord Send. From there, you can:
Review each shipment to ensure the details are correct
Make any necessary adjustments
Add customs declarations
Confirm and print the shipping label
Depending on your workflow, you can choose to handle shipments manually, automate the process, or manage them through external interfaces provided by our integration partners.
For help configuring automation or external handling in your e-commerce platform, please contact your integration partner for guidance.
